 “Thank you Paper Specs and Sappi for the fascinating webinar and absolutely amazing book of special printing effects!! I learned so much!”
“Fan-TAS-tic session. The book is wonderful, but this walk-through tour gave a LOT of helpful information. Many, many thanks!!”
These are just two of the glowing reviews we received after our recent free webinar “Print’s Special Effects Magic” … and with good reason. Not only did attendees receive a complimentary copy of “The Standard 5,” but guest speaker Daniel Dejan, North American ETC Print & Creative Manager for Sappi Fine Paper, took us on a magical creative ride through the amazing techniques featured in this latest installment of the acclaimed series of guides to designing for print.
If you missed the session, just click here to have a listen to the recording. Dejan also answered several questions after the webinar. You’ll find those answers below. Enjoy!
As a designer, how do you create a lenticular printed piece?
A designer would not create a lenticular piece. A designer would choose either a photograph or an illustration that they would like to have a lenticular piece made of. The printer and the stamper would, in fact, do all the work. As I said in the seminar, it’s a very, very complex scan, depending on what you want to lenticularly do. Do you want it to be three-dimensional or do you want it to move? The scan is done accordingly, and then it’s sent to a house where it will be stamped or embossed with those little ridges that make it work. The designer really doesn’t have to do anything. By the way, there’s a wonderful QR code on the lenticular page that the person who asked the question can follow. We give them all the possible information they can possibly need. We want it to be as transparent as possible. Follow the QR code to all the information and it will continue to answer the question more fully.
Do QR codes with or without embedded images have a lower scan rate?
I don’t know that anybody has done any testing, but I think that it’s probably more scans for pieces that are embedded because it’s part of a brand. That’s what I’m trying to emphasize so much in our conversation. If you can embed a logo, logotype or type treatment or something that is associated with your brand, people will associate that QR code with you, which is exactly what you want to do. I think what it does is it compounds brand recognition and brand equity.
How is the flocking effect done? Is it a sculptured varnish?
No. Again, we’ve got a great QR code on the page with the Yeti. If you follow that, you’ll get a ton of information. Very quickly: imagine that you’re looking at really, really tiny spaghetti. When they make the flocking material, first of all, it is recycled material and flocking is recyclable. Imagine that it’s going to be extruded through just like a spaghetti machine. It comes out like little threads, really, really thin. That’s why I was saying when we were talking about it. First of all, it comes in all colors, color-coded to the Pantone system. But also, it comes in different lengths because as it is extruded, it can be cut off into really thin little hair or very long little hair. Think of it more like hairs, if you will, or like a shag carpet – low shag, long shag. That’s how it’s done. Once you’ve got those little hairs and you’ve decided what color and how long you want it, there is one of two ways: either old-school with an adhesive that’s either printed or screenprinted onto the surface and the flocking is adhered to it; or in the case of our piece, it was done electro-statically. While the toner is wet, the flocking is blown onto it. It adheres to it and then it is dried using UV.
Is flocking a powder or an extra layer of material?
Neither. It’s really attaching little plastic hairs, if you will, of predetermined lengths – you specify the length and color you want – to adhesives, either a wet ink, wet toner or a wet glue.
Is flocking available widely or is it still a specialty printer?
It’s available widely. It’s amazing. I’m sorry if I didn’t make this clear. Almost any printer that does special effects printing or a special effects house … most large cities, even medium-sized cities, would typically have a house that does foil stamping, die cutting, embossing, debossing, thermography, flocking. They all have that equipment.
Some printers actually have old Heidelbergs or old Kluge stamping machines, and they can do things like diecutting or foil stamping or embossing/debossing on premise, but things like flocking are sort of a specialty. The printer would send it out to get it done, but it’s widely available. We just don’t think of it. It’s sort of asking, “How available is thermography?” It’s available everywhere.
It’s not expensive. I think we have to make sure that we make modifications or allocate it in time. You have to print the piece, then send it out, and then have the flocking done. Then, it’s sent back and bound into your book or collateral, direct mail piece. Then it’s got to be finished and trimmed and whatever else. There’s shipping on either side plus the time to do it. There are plenty of companies that do it. It’s not like we’re overwhelmed with companies, but they typically are busy. They have schedules. Just because they receive it, it doesn’t mean they’re going to do your job right away. They probably have a production schedule that they have to fit into.
You mentioned expensive so let me add one thing from my point of view. Expensive in what regard? Is it more expensive than thermography?
Only slightly. It’s been around forever. The process is typically done in the same way – old school like thermography. It actually uses the same thermographic line. They print an ink. While it’s wet, they put the flocking on it. A puff of air gets the excess off. It’s blown off your piece, and what falls off is recycled. Then it travels down the line where it’s cured, either using heat to dry the ink or, if it’s electrostatic, using UV to cure, dry and seal it. There’s not much more; you’d be surprised.
Which of the techniques in the book are less hazardous to the environment? The lady that is asking works for a company that tries to be environmentally friendly so obviously, she’s looking for the ones that are recycled and environmentally friendly.
Here’s the interesting thing: everything in our book is recyclable. We actually work with companies where they are using newer techniques, newer metallic inks, newer foil stamping. They’re actually using materials that are intentionally recyclable and environmentally friendly. That entire book, in fact, all of our books, all of our standards are recyclable, environmentally friendly, have a great cradle-to-grave story, low carbon footprint, etc.
I would share with you though; some of the older-school techniques, like the foil stamping, were done with foil, a metal. It can be recaptured; it’s just pricey to do it. It can be reclaimed, but it’s not recyclable. We’re using techniques that are. Everything you see in the book just talk to your printer and ask them. In some cases, they may have to use a different source if you want to be environmentally friendly. The sources are out there, and they’re certainly available.
Do you have to create separate channels within the files that get turned over to appropriately support the special effects that are being introduced?
Yes, in fact, an additional layer in design. I don’t necessarily recommend that you do this yourself because some of these techniques require fit, particularly in things like varnish, UV and all that. You’re never quite sure whether you should do it as a skinny or a fatty or a choke or a spread or how to make it fit properly. I would always leave that to the printer. But you certainly can use Photoshop to create a clipping path to show where you want things to go, or go to separations and pull a separation that will hold as much of the information as you would like. Duplicate it and then erase the part that you don’t want or add what you want. Then create that as a layer and identify what it is: this is the UV, this is the foil stamp, this is the flocking, whatever. Send it in. The printer will then do all the necessary finishing pre-production work to fine-tune it to make it work properly.
What is the cost difference for a sandpaper coating versus a reticulation coating?
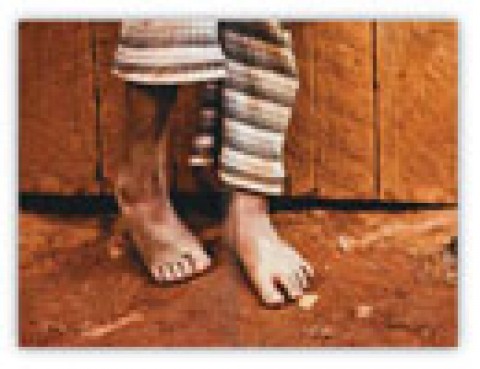
Really not that much. It depends if you’re asking overall because reticulation is almost always spot. You saw the sandpaper coating on the foot, the Sasquatch footprint in the sand. That’s relatively simple because it really just fit an area, as opposed to reticulation where you saw on the snake. You’re going to require an anilox roller. It’s going to require a Cyrel plate, but really, they’re both about the same amount. They really are.
The only thing with reticulation is you’re really looking at two varnishes – a dull and then the reticulated gloss varnish on top of it. Whereas with sandpaper, it is one coating. The dull UV coating that goes down first in reticulation really doesn’t cost that much. It’s pretty straightforward.
Why isn’t there any burnt edged on the laser diecutting?
There are. You just didn’t see them, thank goodness. That’s why the ink was printed on both sides to minimize the burn residue.
So burn first and then the ink on top?
No, it’s always print first then laser diecut. The ink printed on both sides minimizes the burn residue. If you rub your finger along the inside, the black side of the laser diecut, you should get just a little bit of residue. It’s there. We’re not pretending.
On a darker paper, it doesn’t show as much as on a white sheet?
Absolutely, it doesn’t. First of all, you don’t visually see it. The only way that you do not get a burn residue is if you go to a laser diecutting house that has a flow chamber where they can take the oxygen out. It is the oxygen in the air that is combustible that creates the burn. It penetrates the paper. There are systems where the oxygen is removed and an inert gas is replaced. When the laser burns it, no oxygen could combust. It’s just the laser literally burning the paper, but the paper not catching fire or smoldering.
What happens to flock paper when it’s recycled?
Basically, when you recycle flocking, it is very much like ink. The paper is put into water, sometimes with some chemical that releases the flocking from the paper. Everything has a different float capability. In many cases, the pulp once it gets wet will drop to the bottom and the flocking because it’s a plastic will float to the top. It just separates. The pulp is captured. If it’s a company where they’re trying to recycle the flocking, it is, in fact, captured with all the other plastics. It’s melted down and made into new flocking or new park benches.
What would you say is the most interesting technique for the least cost?
Honestly, I love strikethrough. First of all, it can be done on any standard press, six-color. I like the fact that it’s a dull and a gloss plate. I like the fact that it can be done very easily. Also, it really is the most flexible.
As I shared, it could be two varnishes. It could a varnish and aqueous, a varnish and a UV. It could be done the first hit online and the second hit offline. It’s such a beautiful technique. It really makes your artwork accentuated by making the highlighted areas glossy and standing out and then making the dull areas recede. I think it’s visually impactful and inexpensive. It’s the least expensive of all the techniques that we do, other than a simple varnish or a simple UV.
What’s the best site to use to create custom-designed QR codes?
First of all, if it’s just a QR code, certainly there are dozens of sites. I happen to use www.scanlife.com or you can go to www.interlinkone.com – John Foley’s company. If you want to do a custom with embedded logo or whatever, you first have to create the QR code anyway. Then you create the art that you want to embed into it.
This is simple, by the way. This is a simple logo-based QR code. Create the art preferably in Illustrator as line art. It really shouldn’t take more than about 20 percent to 25 percent of the area in the center. Drop it in and erase the pixels underneath as close to the piece as possible so it doesn’t knock out. Then test it.
Keep in mind whenever you’re creating a QR code, test, test, test, test. Print it out on your desktop printer. Try it with every phone you possibly can. Typically, you shouldn’t have any problems with Android-based phones, iPhones, Windows 7 phones. What you may have some issues are in older Blackberries.
It seems you can get the same effect with raised UV that you get with thermography. What is the benefit of one over the other?
Thermography is incredibly inexpensive, for one thing. To get raised UV, keep in mind you’re going to have to be in a press that’s got anilox rollers with photopolymer plates. Not everybody has got that; not every printer has got that. Using clear thermography is inexpensive. It’s quick and it’s a wonderful effect. It’s just terrific. Right now as an example, you can get that raise UV or thermographic effect on a digital coater as well. It’s not just limited to offset printing but the cost difference is pretty dramatic. The upside of raised UV on a press – if you have the budget for it – is it’s done inline and it comes off done.
If I recall correctly, creating the reticulation effect was a two-step process of spot varnish and a gloss varnish. If budget were a concern, would sandpaper coating be an alternative option in creating a similar texture effect?
Absolutely. I think you would get a wonderful effect if you used a fine or medium-fine sandpaper. You would get that wonderful texture. Again, you can do it as a spot. We could have used a very fine sandpaper over the snake as an example and gotten a really lovely scale effect texture to it, really very, very nice. It would work great.
It terms of efficiency and cost, I would say you could use a sandpaper. Reticulation requires more prepress work. The upside of reticulation is the texture is much finer. It’s not gritty the way sandpaper is intended to be. It’s much more subtle and nuanced in reticulation and it stands out. It’s a very nice effect. Yes, you could use sandpaper, absolutely.
What app or software did you use to create the AR experience?
In this case, the app is Junaio. It’s actually an app that was created by the company Metaio in San Francisco. You can actually find them online. I highly recommend, first of all, downloading Junaio onto your phone or your iPad2 or iPad3, obviously, it has to have a camera. I recommend more highly going to www.Metaio.com. There’s a great explanation of all the work that they do plus some superb downloadable samples. You download them, print them off your desktop printer, and then you use the Junaio app to make them come to life. It’s fabulous.
What company did you use to create the AR presentation?
It’s Metaio, yes. Again, I really, really want to warmly invite everyone if you’d like to see some superb examples, go to YouTube. Type in the words “augmented reality.” You’ll go to a landing page within YouTube where there’ll be a pull down menu that shows you this enormous array of augmented reality videos. You’ll see things like business cards and marketing campaigns, tattoos and all these different applications that are just superb
There are a number of different international apps and companies. Right now, I’m sure a lot of people are reading about Aurasma, which is out of England, Blippar – another really great one. There is a ton of really great campaigns that are Aurasma-based, Blippar-based, Junaio-based; so if you go online, you’ll get all that information. Again, I think that’s the best place to go. Also, if you’re really interested, Yahoo, Google, Ask or whatever search engine you use, put in augmented reality. You’ll be amazed how many sites there are and demonstrations that you can download. It’s superb.
 Have a listen!
If you missed “Print’s Special Effect Magic,” it’s not too late! Just click here to have a listen to the full webinar. We extend special thanks to Sappi Fine Paper North America and Daniel Dejan, for this terrific event.

 Have a listen!